
My Second Ethereum mining Rig
Intro
Recently started mining ethereum and decided to blog my experience throughout the process. You can see my first “POC” miner at my lessons learned in part 1. In my second miner I decided to seek a platform that I can scale on and eventually turn into a money generating device.
6+ GPU Miners
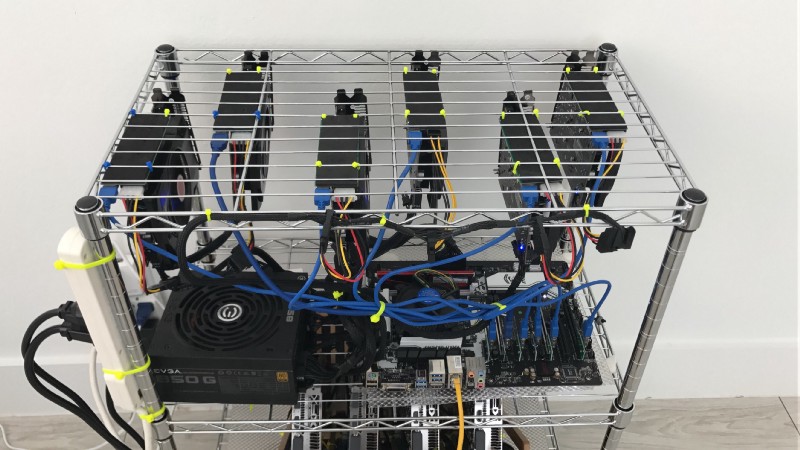
What my new miner looks like
The first thing I did on my second machine was increase the GPU count. Its a simple concept really, the more GPUs the bigger the hash rate (Mh/s), the faster ETH can be mined/generated. This meant getting a motherboard that supported more PCI slots in order to install more GPUs. My favorite motherboard so far base on the price has been this Gigabyte model, other motherboards whom have 6+ PCI slots are + $200. I experimented with a few (ASRock, MSI and Biostar) and cannot say anything specifically negative about them just that the Gigabyte is priced the best. My second choice was the MSI Krait due its build and the ease of upgrading the bios, and finding support online from other miners.
Motherboard Settings
You must adjust the PCI settings on your bios otherwise it won’t boot up with more than 5 GPUs. It will give you a very none descriptive segfaults that looks like this:
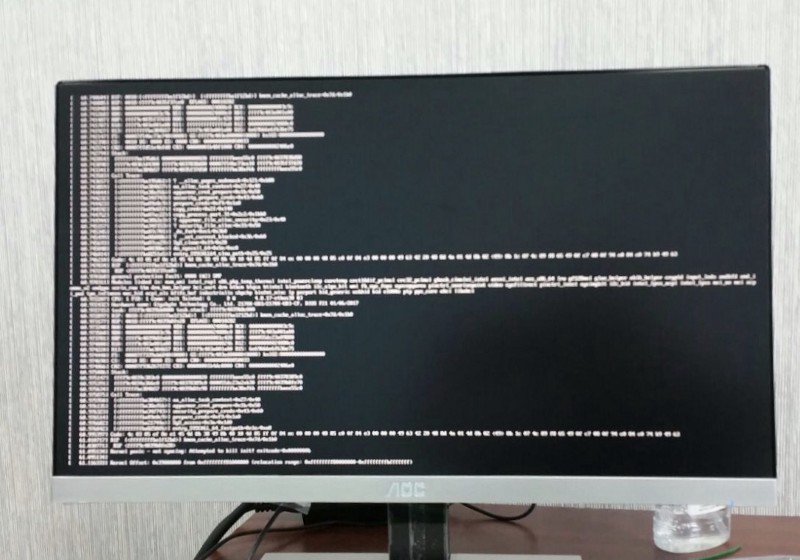
There is a very good guide on how to do this on the MSI’s, on the Gigabyte the setting is under MISC in the home page of the BIOS. Make sure you flash the latest BIOS. Not sure why GEN2 must be defined, but base on some light investigation seems to be related to the amount of data lanes/encoding GEN2 uses versus the default GEN3.
Moreover, going to 6 GPUs also meant bigger power supply, in my hunt anything smaller than a 850 WATT one is too small. I always find modular ones to be the best, again the EVGA is one of my favorite.
Over Clocking
Finding the coolest card! No literally the one that runs the coolest with the least power consumption, a good hash rate and its not above $300 has been my obsession the last 2 weeks. So far I can comfortably say the RX460’s are still my favorite ones base on the above factors. This is simply because I haven’t gotten my hands on any RX470’s or RX480’s, because of their amazing hash rate versus power consumption efficiency everyone seems to want them. If you find them in stock usually they are more than $300+ or try your luck in ebay. Each RX480 can roughly generate 22 Mh/s versus an RX460 at 11 MH/s. Problem is that unlike the expensive brother of the 480 the 460 can be picked up for $109 if you look in the right placed. Yes it is 4GB versus a 8GB card, but we are mining ETH on borrow time we all know that. Just looking at the hash rate versus cost the RX460 seem like a good choice, but when over clocked then it becomes a great alternative.
On ethos to overclock just follow this simple steps:
- Run
show statsit will produce an output similar to:miner: claymore miner_hashes: 11.40 11.43 11.40 11.33 10.57 11.20 models: 01 Baffin RX 460 xxx-xxx-xxx Micron 02 Baffin RX 560 xxx-xxx-xxx Micron 03 Baffin RX 460 xxx-xxx-xxx Micron 06 Baffin RX 460 113-BAFFIN_PRO_160513_4GD5_MS_DF_W8 Micron 07 Baffin RX 460 113-BAFFIN_PRO_4GD5_160925_MIC_0D_72W_W81 Micron 08 Baffin RX 460 113-BAFFIN_PRO_160513_4GD5_MS_DF_W8 Samsung bioses: xxx-xxx-xxx xxx-xxx-xxx xxx-xxx-xxx 113-BAFFIN_PRO_160513_4GD5_MS_DF_W8 113-BAFFIN_PRO_4GD5_160925_MIC_0D_72W_W81 113-BAFFIN_PRO_160513_4GD5_MS_DF_W8 default_core: 1212 1287 1212 1220 1220 1220 default_mem: 1750 1750 1750 1750 1750 1750 vramsize: 4 4 4 4 4 4 core: 1138 1182 1138 1138 1138 1138 mem: 1750 1750 1750 1750 1750 1750 memstates: 1 2 1 1 1 1 meminfo: GPU0:01.00.0:Radeon RX 460:xxx-xxx-xxx:Micron MT51J256M3 GPU1:02.00.0:Radeon RX 560:xxx-xxx-xxx:Micron MT51J256M3 GPU2:03.00.0:Radeon RX 460:xxx-xxx-xxx:Micron MT51J256M3 GPU3:06.00.0:Radeon RX 460:113-BAFFIN_PRO_160513_4GD5_MS_DF_W8:Micron MT51J256M3 GPU4:07.00.0:Radeon RX 460:113-BAFFIN_PRO_4GD5_160925_MIC_0D_72W_W81:Micron MT51J256M3 GPU5:08.00.0:Radeon RX 460:113-BAFFIN_PRO_160513_4GD5_MS_DF_W8:Samsung K4G80325FB voltage: 0.00 0.00 0.00 0.00 0.00 0.00 watts: 0.00 0.00 0.00 0.00 0.00 0.00 overheatedgpu: throttled: powertune: 5 5 5 5 5 5` we will specifically be looking at `default_core: 1212 1287 1212 1220 1220 1220 default_mem: 1750 1750 1750 1750 1750 1750 vramsize: 4 4 4 4 4 4 core: 1138 1182 1138 1138 1138 1138 mem: 1750 1750 1750 1750 1750 1750
The default_core tells us what the expected clock rate of the card is, meanwhile the core tells us what is actually set. In this output you can see most of my cards are actually under clock. Let say we were going to overclock by 5% we calculate that from the default values, for example on the output above my first GPU runs at 1212 MHZ, so a 5% over clock would be 1272 MHZ.
- edit local.conf
vim local.confadd/comment out the following lines:# globalcore 1000 # globalmem 1250 # globalfan 90 # globalpowertune 20
globalcore sets your speed across all cores, globalmem does the same for memory, fan sets fan speed and powertune how much power to provide to the GPU (more means more pull from the power supply more consumption). To increase the 5% just add core
globalcore 1272
# globalmem 1250
globalfan 90
# globalpowertune 20
These settings can also be edited per GPU for example
# cor c94e13 1180 1180 1180 1180 1180 1180
# mem c94e13 2150 2150 2150 2150 2150 2150
# pwr c94e13 7 7 7 7 7 7
where c94e13 is the machine hostname, can be obtained by running hostname and after that have a column per GPU (e.g. GPU0 is first column, GPU1 second). I have different GPUs and this is why you see variations of the default_core in step one. Due to this I set my overclock parameters per GPU (not everyone will have the same 5%) as the following:
#5% everyone
cor 657054 1273 1351 1273 1281 1281 1281
mem 657054 1838 1838 1838 1838 1838 1838
fan 657054 85 85 85 85 85 85
pwr 657054 8 8 8 8 8 8- The last step is easy, save and restart
:wqand thenr😉. Oh don’t forget to verify when the machine boots up again your settings kicked in by runningshow statsagain!
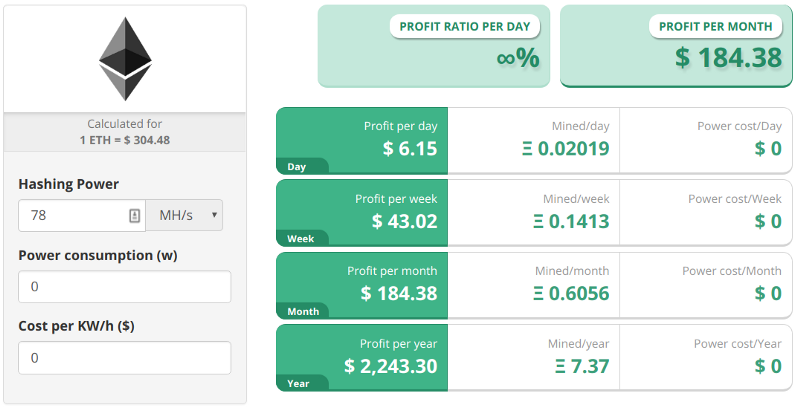
Using this technique I have been able to get the RX460 comfortably producing between 13–14 Mh/s with ran cold with a 850 WATT power supply. In a 6 GPU rig that is 78–84Mh/s which equals to about $184 a month today not taking power cost into consideration. I am spending roughly about $30–40 on power per miner. That is a $144 per month per machine! Not too bad considering that ETH is set to overpass bitcoin in the future due to smart contracts and bitcoin is $4200 this week.
GPU Firmware hacks
Another way to squeeze additional performance out of GPU is to modify their bios. This will overwrite what clock rate the machine thinks it can operate at on its ASIC which will render better performance, but with more risk as well. If a mistake is made while modifying the bios you could end up with a burned GPU. Where as in overclocking the worst is that the machine will crash before then! I haven’t experimented with it yet with it because it requires a windows machine, and also the best custom bioses I have found have been for the RX480/470 and not the RX460. If interested, the following guide does a great job at explaining the process https://steemit.com/ethereum/@yogibear/mine-more-ethereum-with-rx470-rx480-bios-mods
Securing ethos
A part of me was not considering writing this but the security nut in me couldn’t resist. Here are some basic steps to take with your ethos rig, if you haven’t done so already.
ethos is clearly built on Ubuntu 14.04 (Trusty) :
/home/ethos # cat /etc/apt/sources.list | grep deb | tail deb [http://security.ubuntu.com/ubuntu](http://security.ubuntu.com/ubuntu) trusty-security main restricted deb-src [http://security.ubuntu.com/ubuntu](http://security.ubuntu.com/ubuntu) trusty-security main restricted
and their updater is wrapped around the operating system ethos-update does not update ubuntu. In fact when you run an update command they clearly say its not supported it!
/home/ethos # sudo apt-get update WARNING: Upgrading, updating, and/or installing packages with apt-get is unsupported and will likely break ethOS. If you still want to apt-get, use apt-get-ubuntu. update
which means you have a linux machine on an old OS version with ssh open and (default credentials, hopefully not). Here are some basic steps to take to make your machine a tad bit more secure.
- Lock down ssh, by
/home/ethos# vim /etc/ssh/sshd_configdisabling root log in and changing the default port.PermitRootLogin no Port 2222
save and restart the service service ssh restart
-
change default password
passwd ethos
and if you can ssh into your account with a key instead of a password.
Evolution of this Project
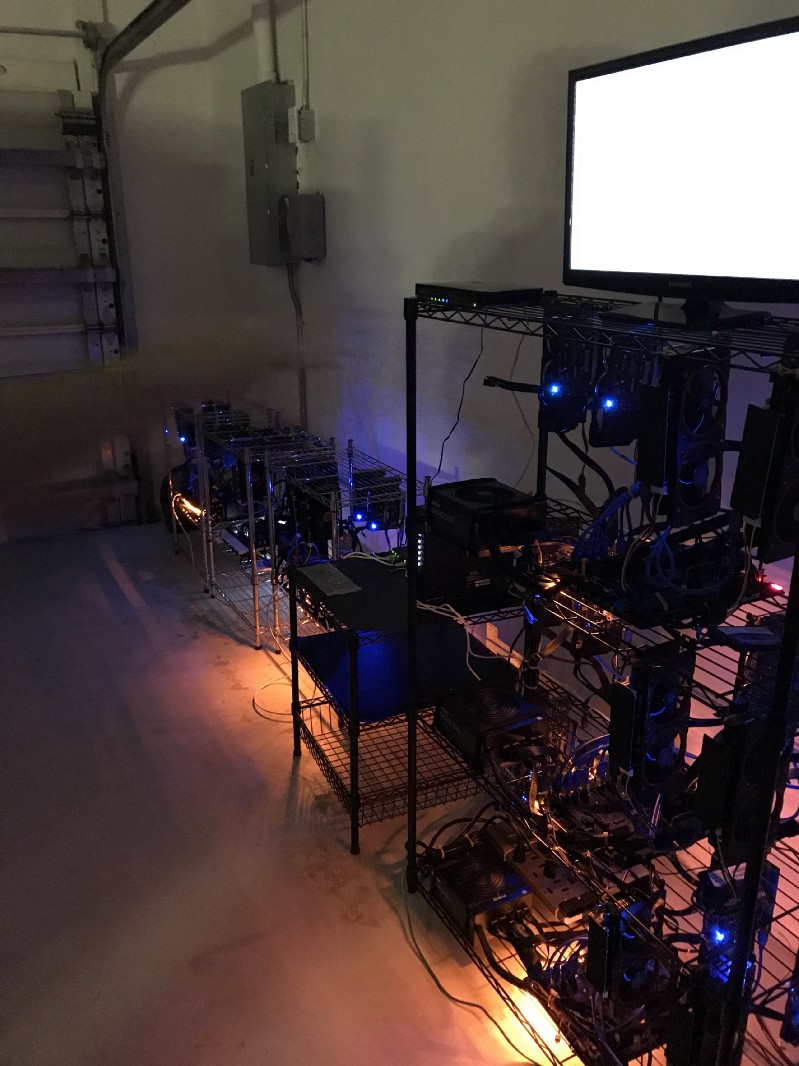
After sharing with a few colleagues my interest in mining and some of my recent escapades they decided to jump in and asked me to build them miners. As a result in a span of a few weeks we have built 12 miners and counting, here is what a one of those larger setups looks like:
6 miners — 18 GPUs
If you are curious or interested in building your own ETH miner, reach out, I am here to help!